When you head West for pronghorns, you must be prepared to shoot longer distances. The terrain is flat and open, and getting within 200 yards of North America’s fastest land animal is difficult. Whether you plan to set your limit at 400 yards and hold over the buck’s back with a flat-shooting rifle or plan to arrive ready to bust lungs with a long-range setup that will clang a steel target at 1,000 yards, heed these long-distance shooting tips.
by Scott Haugen
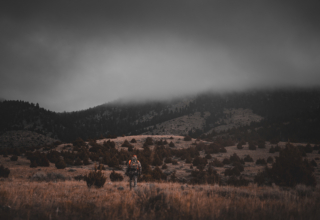
I was prone, bipod solidly secure in the hard dirt. The pronghorn I’d been chasing for two days was bedded in short, yellow grass 750 yards away. The buck was slightly elevated, giving a perfect angle to slip a bullet in behind the shoulder.
I dream of moments like these.
It was mid-day. Temperatures eclipsed the century mark. But no matter how hard I tried, I couldn’t see a clear image in my scope, as the heat waves flowing off the torrid desert floor were overpowering. I moved forward to an elevated knoll, but still, the heat waves toyed with my vision and obscured my view.
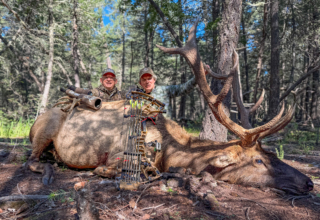
Dipping into a swale, I closed the distance. Inching to the top of a knoll, I was inside 300 yards. The heat waves were minimal. The shot was simple at this distance — 287 yards, to be exact. Soon I was breaking down the buck and getting it into coolers.

No matter what big game you’re hunting out West, achieving long shots increases the odds of success. And nowhere is this more true than on hunts for open-country pronghorn. But the question remains, “What constitutes a long shot?”
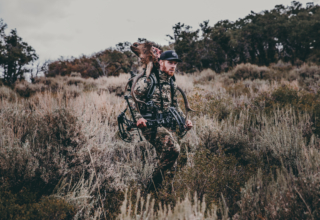
I’ve been on many pronghorn hunts over the years in multiple states. Antelope tags are easy to draw in some places and simple adventures to accomplish on your own. I highly recommend them for first-time western hunters, kids, newbies, and seasoned hunters alike. The pronghorn is a remarkable species, and you won’t find a more brilliantly-colored big-game animal in North America.

Many hunters I’ve run into on these hunts have expressed the same frustration, and that frustration is: they have trouble getting close enough for a shot. When asking many of these hunters how close they want to get, a very high number said within 200 yards. Yikes!
Let’s stop and think about this. Many of us who live out West zero our rifles at 200 yards, meaning that’s a slam-dunk distance to connect on. With the flat shooting rifles used on pronghorn hunts, you can still hold high on a buck’s shoulder at 300 yards and hit the kill zone. At 400 yards, putting the crosshair just over the pronghorn’s back will still reach the vitals.
Then there are today’s long-range rifles. These specially built guns will punch pop cans all day at 1,000 yards. Making 1,200-yard shots with them is not difficult under the right conditions. Are they for everyone? Certainly not, but they have been game changers for hunters who have dedicated themselves to learning how to shoot them and where their applications lie.
The first time I shot a buck using a long-range rifle, I was surprised at how intense it was. It wasn’t a deal where I spotted a buck, set up the gun, punched the trigger, and went home. It took several minutes for everything to come together.
The buck was 960 yards away. It was leisurely feeding, and had no clue I was around. It took me a few minutes to dig myself and the rifle into where I felt stone solid on the hard ground. A breeze in the draw separated me from the buck. I just needed to wait the wind out. I wasn’t going to pull the trigger at this distance unless there was no wind. That took another 15 minutes.
By this point, the long-range experience reminded me of bowhunting due to the patience needed and the focus spent on so many details. What’s impressive about long-range shots is how slow things move, including animals. If a buck doesn’t know a hunter is around, there’s almost no need to hurry. On a bedded buck, you might wait hours for it to stand up to present a clear shot.

The key with long-range shots on pronghorn comes down to knowing your gear and confidently shooting it. Never take a shot if the last thought going through your mind when pressuring the trigger is, “I sure I hope I hit it.” If you’re not 100 percent certain you’re not going to kill the buck with one well-placed shot, don’t shoot.
There’s no guessing in long-range shooting. You know what the scope, gun, and bullet are capable of at exact distances and will only take the shot when all is right. As mentioned, there is rarely a rush when shooting an animal at long distances because the animal does not know you’re there. You’re in control. Take your time and concentrate on the details.
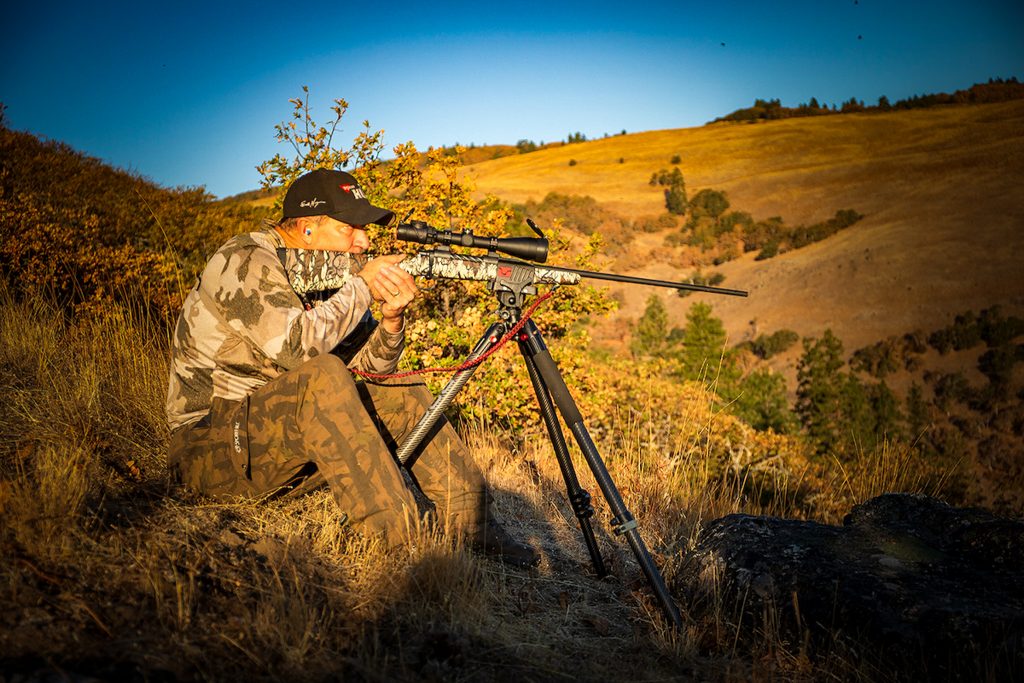
Shooting from a prone position is the most stable, providing multiple anchor points for your body and the gun. Cross-legged is the next best position, as securing both elbows on both knees optimizes anchor points. Kneeling is third, but elevate the knee on the same side you’re shooting from. In other words, if shooting right-handed, elevate your right knee and rest your right elbow on that knee. This feels awkward at first, so practice it.

You’ll immediately see it’s much more secure shooting this way versus what you commonly see where the non-shooting elbow is down and the shooting elbow is floating in space. Standing is the final long-range shooting position, and even this can limit how far you’ll want to shoot.
Having a bipod mounted to your rifle allows for a stable shooting rest. But make sure it can be tightened down before taking the shot. It would help if you never had to time your shot with the alignment of a crosshair as it randomly passes over an animal. The crosshair should be dead steady on the animal, so all you have to do is touch the trigger.
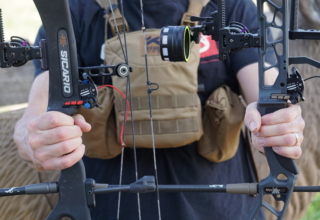
Keep in mind that gun-mounted bipods have their limits. Tall grass, sagebrush, and other foliage can often impede using a gun-mounted bipod because you can’t gain the needed elevation for a clear shot. I have seen many hunters that come West, and all of them could shoot well, not be able to take long-range shots because of the limitations of their gun-mounted bi-pod system. Some models can be difficult to level, too, which is a must. Other models are tall, thin, and flimsy, not suitable for shooting long distances. If using a gun-mounted bipod, be sure to have an extendable tripod along that you can shoot with from a kneeling or standing position.
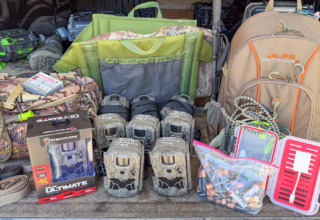
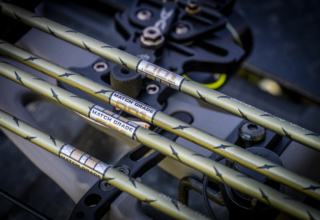
My most commonly used long-range setup consists of two small shooting bags — a 1-pound and a 3-pound bag I carry in my backpack — and a Bog Gear Deathgrip Tripod. I only shoot long-range from the hard ground, a big rock, or a large stump, as these provide a stable base. Never rest your rifle on a pack or jacket to shoot long distances, as there’s too much movement. Please remember to anchor the shooting rest on a hard surface.
If I can’t get prone with the little shooting bags on a hard surface, my next move is to sit cross-legged with the Deathgrip. If I’m hiking and covering a lot of ground on foot, I take the Deathgrip Infinite, made of carbon fiber. If hunting from an ATV where walks are short, I’ll go with the heavier and more stable aluminum Deathgrip. Avoid shooting from tripods with a telescoping center post because the further away your rifle is from the fulcrum, the more difficult it becomes to balance.

Using a standard folding tripod, I’ve shot several pronghorn in the 250-350 yard range. These are quick and easy to handle. Just make sure they won’t buckle under pressure and offer steady support.
If I can’t shoot over brush from a cross-legged position, I turn to kneeling, then standing as a last option. All are good, just make sure the gun is tightly secured in the vice of a tripod and don’t pull the trigger unless you’re solid.
As I write these words, I’m days away from learning if I drew a prized pronghorn tag in a state where I have 24 preference points. If I get it, I’ll be taking my long-range setup, glassing and passing lots of bucks that won’t even know I was there, and shooting a monster buck or nothing.